No one knows handmade gifts like the woman behind Glass Gardens, London's most loved DIY terrarium business.
"Handmade gifts are the most thoughtful gifts! We put our emotions and care into the process – to me, any type of handicraft wins against mass production and consumption any day." says Emilia.
We agree! As well as being a heartwarming option, DIY gifts are a wonderful way to cut costs when it comes to the expensive world of gift-giving. For those of us looking for crafty ways to save money in 2026, a spot of pressie making could be your new favourite way to brighten your friend’s day while saving yourself a few pennies in the long run…
Ready to roll up your sleeves and wow some loved ones? Our talented and creative community of teachers are here to help with nifty tips and tricks for making purse-friendly DIY gifts – warm hearts guaranteed.
Soothe their senses with some DIY soap
We chatted to talented soap and candle-maker, Emily from Yougi, to get her recipe for delicious handmade soap.
Emily believes that “soap making is a very thoughtful gift as it can be personalised to the individual. Scent is also the most powerful of the senses, making it an emotive gift.”
Who doesn’t love receiving smellies? Not only is soap making a simple and accessible craft but once you’ve got the process down and the materials in, you can create thoughtful and totally inexpensive gifts for all your friends and family for years to come – consider it a gift investment!
How to make handmade soap on a budget
A few things you’ll need
-
A wooden or recycled soap mold (tip: by opting for a recycled or wooden mold, you can save a few pennies and use it time and time again!)
-
100g soap base
-
Your essential oils of choice
-
Dried flowers to decorate (tip: why not dry your own from the garden?)
How to make soap that smells divine
-
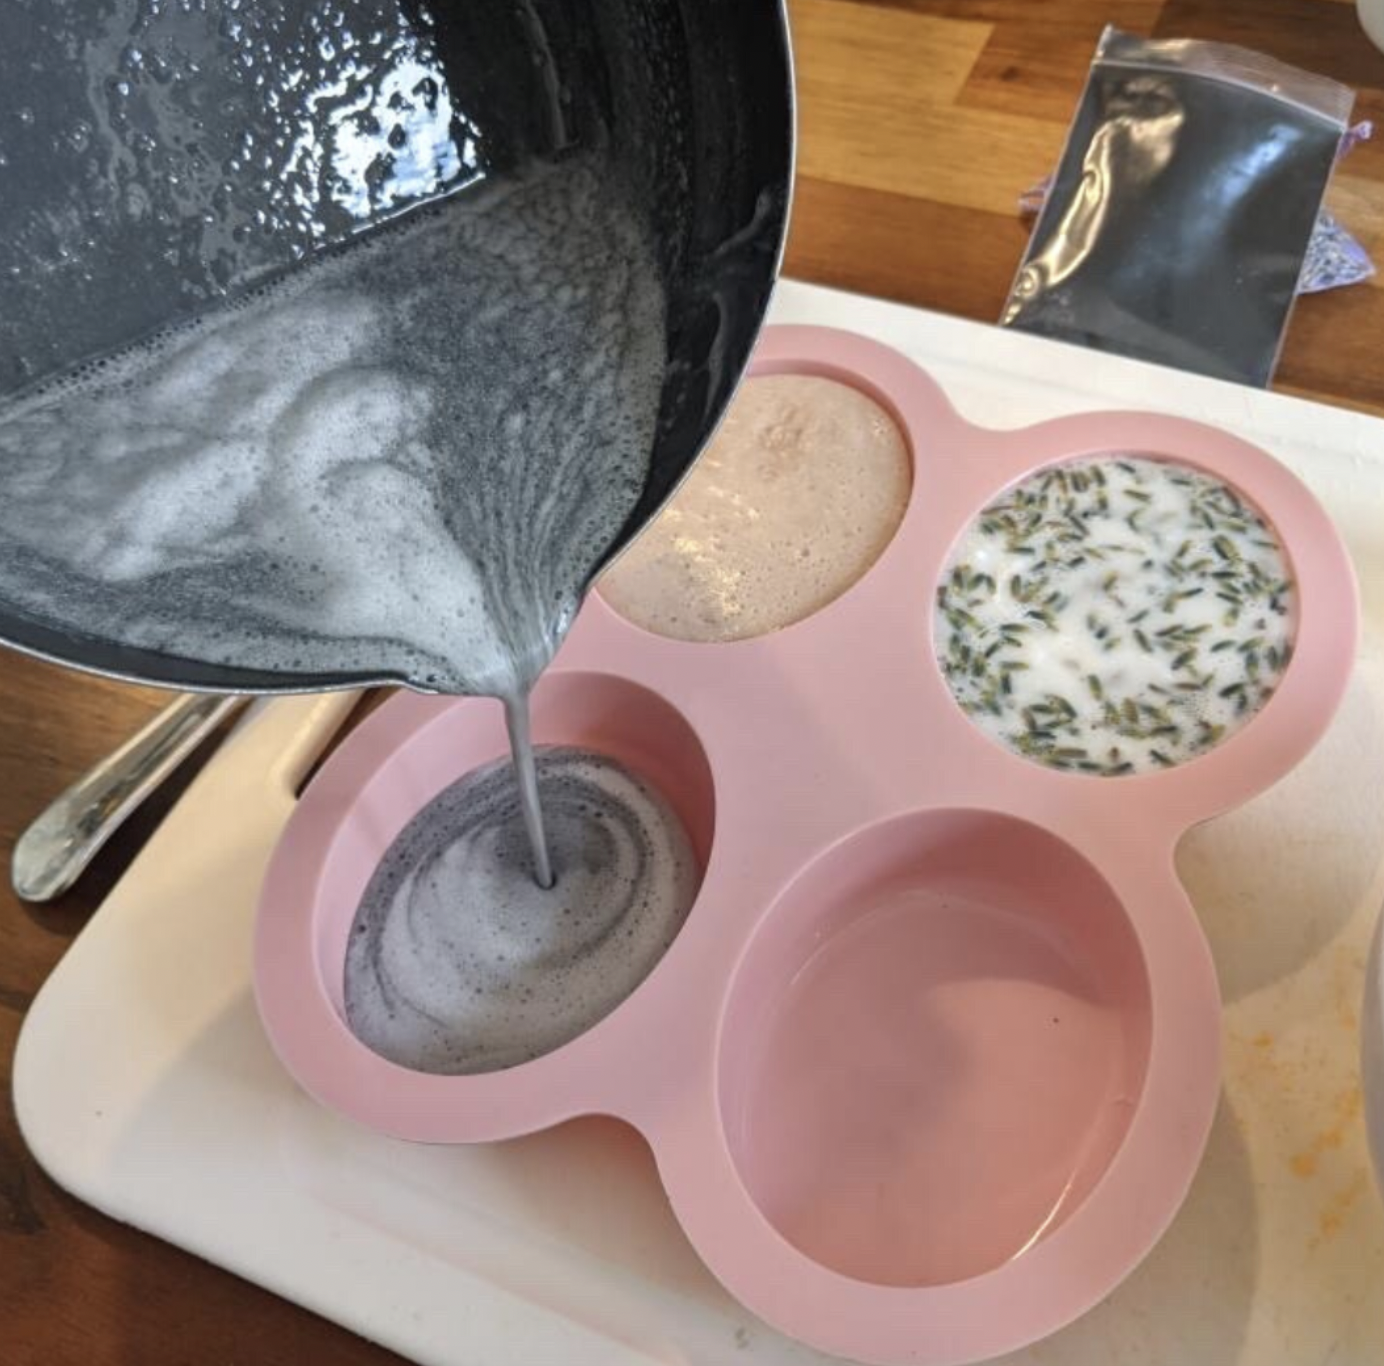
In a metal saucepan, slowly melt your soap base on low-medium heat. Continue to heat until it's all melted.
-
Pour 100g soap base into a bowl.
-
Mix in 3ml of essential oil (maximum 4% oil to soap base).
-
Mix in half a teaspoon of dried lavender or other flowers and mix well.
-
Pour the mix into the soap mould and let it sit for an hour.
-
Continue the process to make more soap – yep, it really is that simple!
Want to learn more about soap making? For £35 you can have a DIY craft box delivered to your door with all you need to get started on your soap-making journey. Or, visit Emily in her plant-filled studio in London and learn more about other DIY gift options like candle making and even bath bomb making!
Adorn them with a one-of-kind tote bag
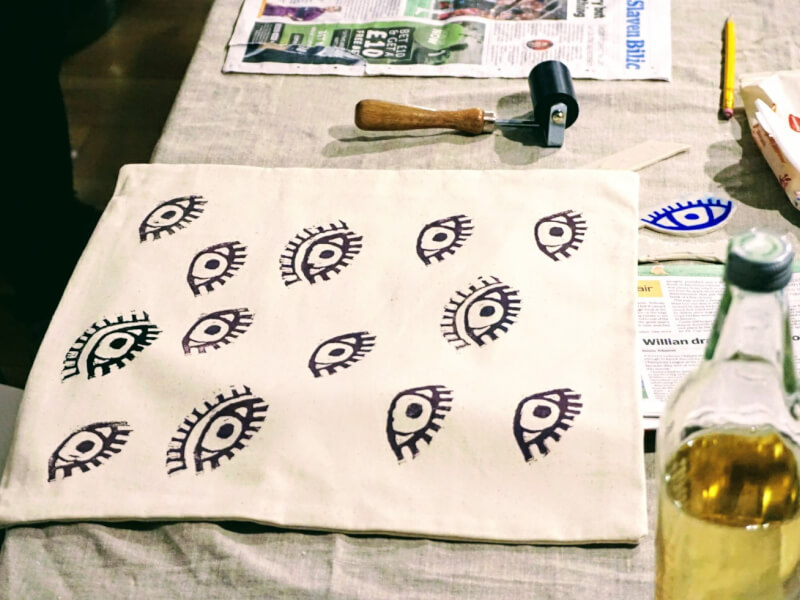
“Lino printing is a great craft for gift giving because it's an easy way to make a gift that's personalised to your recipient. Once you've made the stamp, you can also print your design on loads of other things!” - Hannah, M.Y.O
Crafty extraordinaire, Hannah from Make Your Own, thinks that giving your favourite person a lino-printed tote bag is the perfect pressie if you’re looking to save a few pennies. Although a little costly upfront, once you’ve got your materials, you can make thoughtful gifts for all your pals. You don’t have to stop at tote bags – think tea towels, t-shirts, posters and more!
Gather the following:
-
Safety guard
-
Tote bag (you can find blank canvas tote bags online for 50p!)
-
A selection of lino
-
Pencil
-
Inking tray
-
Ink roller
-
Printing inks (water-soluble)
-
Baron (with lino cutters
-
Layout paper
Tip: Hannah says: “it's best to buy lino material in bulk or order large pieces and cut it up to make it the most cost-effective.”
How to lino print – the first steps
-
Draw the outline of the piece of A5 lino onto the A4 layout (thin) paper, so you’re left with a box on the paper. You can cut the lino smaller if you want to.
-
Choose a simple design and sketch it on the paper inside the outline of the lino. Think about what the receiver of this birthday or Christmas gift likes and their hobbies.
-
Now you can transfer the design onto the lino. Just flip the layout paper over onto the smooth side of lino and line it up inside the outline. Use the baron handle to apply pressure over all of the sketches. The pressure will transfer a mirror image of your sketch onto the lino. Touch up with a pencil if the transfer is faint.
Start carving – you can do it!
-
Safety first. Carve away from your body and fingers.
-
The areas you carve will be white when printed. Carve out the 'negative' space or the line of your image – you choose. You have different cutters that carve different widths – be sure to try them all on the practice piece of lino.
-
Keep the angle of your cutter approx. 30° to the lino – curved edge on lino.
-
When you can feel the groove in the lino with your finger, that's when you know it’s deep enough. You don’t need to go too deep. Try for a level, even cut. If you’re finding it hard to carve the lino, reduce the angle of the cutter.
-
Embrace mistakes – remember, your first try is all about giving it a go and learning the technique!
Get printing!
-
Put some newspaper down and clean the tile of carved lino bits.
-
Squeeze out a little ink onto the ink tray.
-
Roll the roller in the ink until smooth and velvety – wait for the ‘printer’s kiss’!
-
Roll the ink evenly onto the carved side of the lino.
-
Gently place the lino ink side down onto a piece of A5 paper, flip it over and evenly press (hard!) over all the paper with the baron handle and a clockwise pressure.
-
Gently remove the lino tile from your tea towel or tote bag, and look at your print!
-
Now, don’t worry if it isn’t perfect – you can carve more or apply some more ink and re-print. If the ink is faint on the fabric, you may need to apply more pressure when printing.
Want some help getting started? For £40, you can rock up to Hannah’s wonderful London lino-printing class and get this gifting skill under your belt for good.You’ll walk away with some grade-A creations for your friends and family!
Be a generous green thumb with a DIY terrarium
Did you know that any clear glass vessel can be turned into a terrarium? We had a natter with green-fingered Emilia, from Glass Gardens London, about giving a handmade terrarium as a gift, and she had plenty of ideas and tips up her sleeve for making it a budget-friendly affair – so get ready to please the plant-lover in your life (without splashing £90 on a potted cactus).
“Terrarium making doesn’t have to be expensive, but there are some certain rules and materials that should be used.” - Emilia, Glass Gardens London
Step 1 - Find your perfect plant home
According to Emilia, you can get creative with what you have around the home to make a terrarium! She absolutely loves to upcycle empty drink bottles, jars, vintage carafes and old-school demijohns to give them a second life as a lovely botanical decoration.
Tip: Choose a glass vessel with a wide enough opening so you can reach the bottom with your hand (narrow-necked bottles require use of tools).
Step 2 - Gather your gravel and sprinkle your soil
For good drainage in your terrarium, place some gravel or clay pebbles at the bottom of your vessel then add your soil mix on top.
Your soil mix needs to be able to dry fast – Emilia recommends lightweight, fluffy, good at draining and peat-free soil. You can create your mix at home or buy it ready-made.
Tip: Gravel can be easily found in your surroundings so save your pennies and don’t buy it – just make sure you bake it in the oven or boil it for a few minutes to sterilize and make sure no unwanted passengers are hiding on the surface.
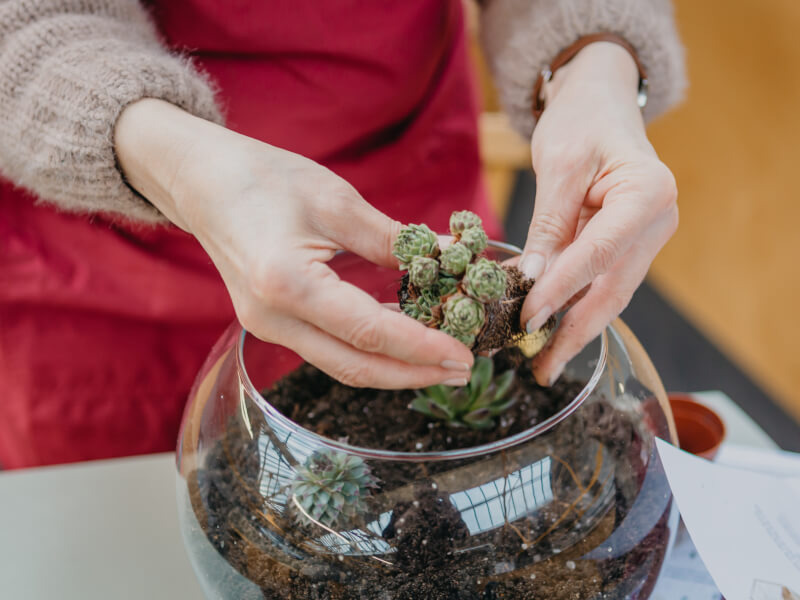
Step 3 - Pop your plant babies in their new home
Now it’s time to add your plants! Choose any budget-friendly native tropical or humidity-loving plants you can find, such as fittonia, peace lily, parlour palm, ivy, creeping fig or ferns!
Tip: Be sure to inspect plants and check if they are free from pests and mould, as both can affect your terrarium.
Step 4 - Get creative and decorate your mini jungle!
Decorate the top with sterilized stones, shells, sand, preserved moss or pieces of wood such as mangrove or azalea roots.
Have a root around in your garden and get creative with what you can add and how you decorate. Giving your own personal touch to your terrarium is a fantastic way to display your spiky friends in all their glory!
Moss is not compulsory, but it's a great moisture indicator – when the terrarium is underwatered, the moss turns pale and dries out, when overwatered it will turn brown and rot eventually. It also gives a fantastic natural vibe to your glass garden and can be easily found outside!
Tip: If you decide to obtain moss from outside, keep it for a week in a clear plastic container such as a takeaway box, mist regularly and wait until any potential bugs can get free.
Step 5 - Give her a feed and send her on her way
Before tying a ribbon around your beautiful terrarium, give her a little drink! Then, get ready to say goodbye and take her to her new home!
“Terrariums change over time – plants grow, change shape and sometimes you can observe it turning into an absolute jungle. I am sure that any person that receives a terrarium as a gift will be hooked on looking at it every day to spot small changes. Terrariums can’t be factory made, so it really is an amazing gift idea!” - Emilia
Want to get into terrarium making? If you fancy some extra help and guidance before giving it a go, join Emilia at her London terrarium workshop so you can learn the ins and outs with a pro!